【动机】
众所周知, 清屏采用 clear 命令即可. 只不过有时为了做一些后台进程加载, 或者纯粹为了提升一些用户体验, 可能需要将清屏的过程做一些修饰.
【意图】
以屏幕每个显示位置(注意不是像素模式下的点, 而是字符模式下的显示单元)为单位, 逐个擦除, 或者配合多个后台进程模拟从不同方位, 同时擦除, 擦除前可能需要将屏幕先涂色.
【效果】
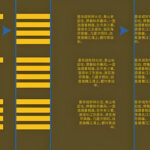
先看看效果:
清屏涉及到一些计算, 所以现在在 data.sh 中, 准备几个函数
【预备函数 index_in_strings】
该函数用于获取字符串在字符串数组中的索引, 可放在 data.sh 中
:<<COMMENT
查找指定字符串, 在后续的字符串系列中的序号
$1: 要查找的字符串
$2 及以后: 在该字符串系列中查找.
返回值: 该元素在该字符串系列中的序号, 0 是第一个元素. -1 代表找不到
用法:
1. 在单个字符串中搜索, 该字符串可能包含多个子串(多个子串由空格分隔):
index_in_strings "$search" "$string"
2. 在元素可能存在空格的字符串数组中搜索
index_in_strings "$search" "${arr[@]}"
3. 将字符串数组中的元素, 逐个作为参数
index_in_strings "$search" $one $two $three ...
COMMENT
index_in_strings(){
local search=$1
shift 1
local curr=0 find=-1
local arr=("$@")
for s in "${arr[@]}";do
[ "$s" == "$search" ] && find=$curr && break
curr=$[curr+1]
done
echo $find
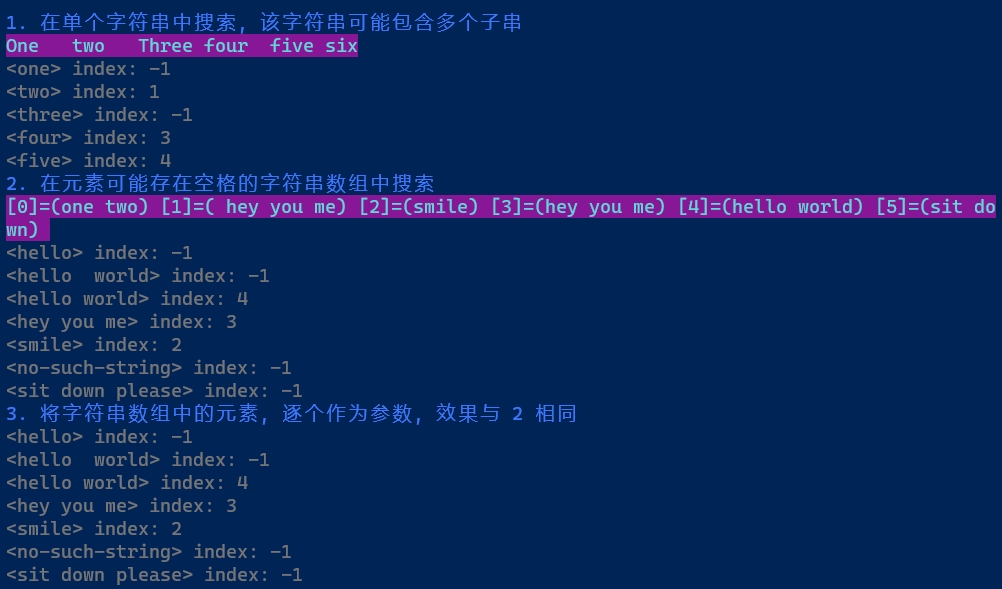
}测试 index_in_strings 函数:
  # 根据实际文件位置修改路径
    # source ./data.sh
    way1(){

        array2string(){
            local idx=0
            for idx in ${!strs[@]};do
                printf "[%s]=(%s) " $idx "${strs[idx]}"
            done
            # 去掉最后一个不必要的空格
            [ $idx -ne 0 ] && printf "\b" || :
        }

        local idx search
        tip "1. 在单个字符串中搜索, 该字符串可能包含多个子串"
        local searchs="one two three four five"
        local strs="One   two   Three four  five six"
        notice "$strs"
        idx=-10
        for search in $searchs; do
            idx=$(index_in_strings "$search" $strs)
            info "<$search> index: $idx"
        done

        tip "2. 在元素可能存在空格的字符串数组中搜索"
        local searchs=('hello' 'hello  world' 'hello world' 'hey you me' 'smile' 'no-such-string' 'sit down please')
        local strs=('one two' ' hey you me' 'smile' 'hey you me' 'hello world' 'sit down')
        notice "$(array2string)"
        idx=-10
        for search in "${searchs[@]}"; do
            idx=$(index_in_strings "$search" "${strs[@]}")
            info "<$search> index: $idx"
        done

        tip "3. 将字符串数组中的元素, 逐个作为参数, 效果与 2 相同"
        local searchs=('hello' 'hello  world' 'hello world' 'hey you me' 'smile' 'no-such-string' 'sit down please')
        idx=-10
        for search in "${searchs[@]}"; do
            idx=$(index_in_strings "$search" 'one two' ' hey you me' 'smile' 'hey you me' 'hello world' 'sit down')
            info "<$search> index: $idx"
        done
    }
    way1
    unset -f way1
测试结果如下:
【预备函数 ensure_integer 】
该函数确保给定的数据为指定的整数(一般在此处填入默认值), 可放在 data.sh 中.
:<<COMMENT
    确保给定的数据, 是整数, 包括正整数, 负整数和 0
    $1: $2不合格时, 返回此默认值
    $2: 要考察的数据
    使用: ensure_integer <default-integer> <datastring>
    返回值: 优先考虑给定数据, 不合格则返回默认值
COMMENT
ensure_integer(){
    [ -z "$1" ] && error "未指定默认值" && exit 1
    [[ $2 =~ ^[+-]?[0-9]+$ ]] && echo $2 || echo $1
}
该函数非常简单, 目的只在于避免调用函数中重复出现正则表达式. 测试略.
【预备函数 random_from_range】
该函数返回给定边界的整数值, 此处利用了系统预设变量 RANDOM , 它随机返回0至32767的整数.
:<<COMMENT
    根据指定范围, 获取随机数
    $1: bound1 default to 1
    $2: bound2 default to 100
    用法: random_from_range <bound1> <bound2>
    注意: 边界值顺序不要求; 返回的随机值包含边界值
COMMENT
random_from_range(){
    local start=$(ensure_integer 1 $1)
    local end=$(ensure_integer 100 $2)

    # 边界值修正
    if [[ $start -gt $end ]]; then
        let start+=end
        let end=start-end
        let start=start-end
    fi
    echo $((RANDOM % (end-start+1) + start))
}
测试如下:
    # 测试 random_from_range
    # 根据实际文件位置修改路径
    # source ./data.sh
    way3(){
        echo
        local i
        for i in $(seq 1 50); do
            printf "%d " $(random_from_range 6 -6)
        done
        echo
    }
    way3
    unset -f way3
测试结果

可见, 边界可为任意整数(正负以及0), 且边界顺序不作要求.
【预备函数 random_from_strings】
从给定的字符串系列中, 随机返回一个作为结果.
:<<COMMENT
    从给定的字符串列表中, 随机返回一个字符串
    $@: 字符串列表, 空则返回空
    用法:
        1. 参数以单个字符串中表示, 该字符串可能包含多个子串(多个子串由空格分隔):
                random_from_strings  "$string"
        2. 在元素可能存在空格的字符串数组中搜索
                random_from_strings  "${arr[@]}"
        3. 将字符串数组中的元素, 逐个作为参数
                random_from_strings  "$one" "$two" "$three" ...
COMMENT
random_from_strings(){
    if [ $# -ge 1 ]; then
        local idx=$(random_from_range 1 $#)
        echo ${!idx}
    fi
}
【预备函数 draw_rect】
绘制指定区域, 文本可选. 注意此处未采用常见的 x,y,width,height 形式的参数. 默认区域为全屏.
:<<COMMENT
    垂直方向, 逐行绘制矩形,  所有参数可选
    $1: left_x, 矩形左侧的 x 坐标(起点终点相同), 代表屏幕左上角向右第几列(边沿为 1), default to 1 (x)
    $2: start_y, 起点 y 坐标, 代表屏幕左上角向下第几行(边沿为 1), default to 1 (y)
    $3: end_y, 终点 y 坐标, 计算方式同 y1, default to the last line (y2)
    $4: w, 矩形的宽度(指的是屏幕占列数), default to the screen width
    $5: clr_str, default to '32;45'
    $6: text, 要居中显示的文本. 左右上下尽量居中
    $7: all, 任意字符串, 表示文本在每行都显示. 默认(包括空)是仅仅是中间一行
    用法: draw_rect <x> <start_y> <end_y> <width> <clr_str> <text> <all>
COMMENT
draw_rect(){
    local left_x=${1:-1}
    local start_y=${2:-1}
    local end_y=${3:-$(tput lines)}
    local w=${4:-$(tput cols)}
    local clr_str=${5:-'32;45'}

    local y_text=$[($end_y+$start_y)/2]
    local step=1
    [ $start_y -gt $end_y ] && step=-1

    local y ptail
    for y in $(seq $start_y $step $end_y); do
        ptail=($w $clr_str  $y $left_x)
        [[ "$6" && ( "$7" || $y == $y_text ) ]] && draw_text_center "$6" ${ptail[@]} \
            || draw_spaces ${ptail[@]}
    done
}
【预备函数 paint_unit】
给屏幕的一个指定横纵坐标的位置染色, 位于 console.sh
:<<COMMENT
    给屏幕的一个指定横纵坐标的位置染色. 注意坐标值是从 1 算起. 即第一行(列)的索引为 1
    $1: x   index of column( not nullable )
    $2: y   index of line( not nullable )
    $3: clr_str  color string
    用法: paint_unit <x> <y> <clr_str>
COMMENT
paint_unit(){
    local clr_str=${3:-"0"}
    printf   "\033[$2;$1H\e[${clr_str}m%1s\033[0m"
}
很明显, 函数的目的主要还是避免在调用方重复书写位置/颜色格式
【预备函数 paint_rect】
在指定区域涂色, ,位于 console.sh
:<<COMMENT
    涂色指定区域, 默认逐列, 若要逐行, 必须明确指定为 by_col
    $1: x1: 起点 x 坐标 ( not nullable )
    $2: y1: 起点 y 坐标 ( not nullable )
    $3: x2: 终点 x 坐标 ( not nullable )
    $4: y2: 终点 y 坐标 ( not nullable )
    $5: step: 步进值 ( nullable, default to 1)
    $6: style 涂色方式 ( nullable, default to by_col)
        1) by_row: 逐行
        2) 其他(包括空): 逐列(by_col)
    $7: zigzag 是否启用锯齿 ( nullable, default to false)
        1) true: 是
        2) 其他(包括空): 否
    $8: clr_str
    用法: paint_rect x1=0 y1=0 x2=cols y2=lines <step=1> \
            <style=by_col> <zigzag=false> <clr_str>
COMMENT
paint_rect(){
    local cols=$(tput cols) lines=$(tput lines)
    local x1=$(ensure_natural 0 $1)
    local y1=$(ensure_natural 0 $2)
    local x2=$(ensure_natural $[cols-1] $3)
    local y2=$(ensure_natural $[lines-1] $4)

    local step=$(ensure_natural 1 $5)
    local x_step=$step  y_step=$step
    [ $x1 -gt $x2 ] && let x_step*=-1
    [ $y1 -gt $y2 ] && let y_step*=-1

    # 默认逐列
    local inner_start=$y1 inner_step=$y_step inner_end=$y2 # 先变化, 位于内层循环
    local outer_start=$x1 outer_step=$x_step outer_end=$x2 # 后变化,

    # 修改为逐行
    [ "$6" == "by_row" ] && \
        inner_start=$x1 && inner_step=$x_step && inner_end=$x2 && \
        outer_start=$y1 && outer_step=$y_step && outer_end=$y2

    #
    #local bclr=$(ensure_natural 0 $8) fclr=$(ensure_natural 0 $9)
    local clr_str=${8:-"0"}

    local d=0 sign
    local coord
    for outer in $(seq $outer_start $outer_step $outer_end); do
        sleep 0.01
        if [ "$7" == true ]; then
            d=$[ outer - outer_start ]
            d=$[ d > 0 ? d : -d ]
            sign=$[ inner_step > 0 ? 1 : -1 ]
            d=$[d*sign]
        fi
        for inner in $(seq $[inner_start+d] $inner_step $inner_end); do
             [ "$6" == "by_row" ] && coord="$inner $outer" || coord="$outer $inner"
            paint_unit $coord $clr_str
            sleep 0.002
        done
    done
}
由于函数同时考虑了涂色方式(逐行/逐列), 是否启用锯齿的选择, 所以存在比较多的判断, 而这也是代码稍长的原因. 这样做的好处是, 下面的 erase_screen 调用起来会非常的简单而整齐.
【核心函数 erase_screen】
清屏, 唯一参数是擦除方式, 目前一共九种, 随机或者书写错误的方式, 从这九种方式中产生. 该函数位于 console.sh
:<<COMMENT
自定义清屏
    $@: erase_style 擦除方式
        0. left to right: 左边到右边
        1. right to left: 右边到左边
        2. center to sides:  中间到左右两边
        3. top to bottom: 上边到下边
        4. bottom to top: 下边到上边
        5. middle to sides:  中间到上下两边
        6. center to corner:  中间到四个角
        7. corner to center:  四个角到中间
        8. louver
        default: random 以上几种方式随机选其一
    用法: erase screen <erase style?>
COMMENT
erase_screen(){
    local styles=(
        'left to right'           # index 0
        'right to left'
        'center to sides'
        'top to bottom'
        'bottom to top'
        'middle to sides'
        'center to corner'
        'corner to center'
        'louver')                 # index=8

    local rdm_sty=$(random_from_strings "${styles[@]}")
    local sty=$(available_range "$@" "$rdm_sty" "${styles[@]}")
    log_info "$sty"

    local lines=$(tput lines) cols=$(tput cols)

    local start_x=1                 start_y=1
    local end_x=$cols               end_y=$lines

    local mid=$[cols/2+1]             ct=$[lines/2+1]
    local start_x_1=$[start_x+1]    start_y_1=$[start_y+1]
    local end_x_1=$[end_x+1]        end_y_1=$[end_y+1]

    local left_top=" $start_x $start_y "      middle_top=" $mid $start_y "       right_top=" $end_x $start_y "
    local left_middle=" $start_x $ct " middle_center=" $mid $ct "  right_middle=" $end_x $ct "
    local left_bottom=" $start_x $end_y "  middle_bottom=" $mid $end_y "   right_bottom=" $end_x $end_y"
    local left_top_1=" $start_x_1 $start_y_1 " right_bottom_1=" $end_x_1 $end_y_1  "

    tput init
    tput civis  # 隐藏光标
    case "$sty" in
        'left to right')
            paint_rect $left_top $right_bottom ;;
        'right to left')
            paint_rect $right_top $left_bottom  ;;
        'center to sides')
            paint_rect $middle_top $right_bottom &
            paint_rect $middle_top $left_bottom  ;;
        'top to bottom')
            paint_rect $left_top $right_bottom 1 by_row;;
        'bottom to top')
            paint_rect $left_bottom $right_top 1 by_row;;
        'middle to sides')
            paint_rect $left_middle $right_top 1 by_row &
            paint_rect $right_middle $left_bottom 1 by_row ;;
        "center to corner")
            paint_rect $middle_center $right_top 1 by_row true &
            paint_rect $middle_center $left_top 1 by_col true &
            paint_rect $middle_center $right_bottom 1 by_col true &
            paint_rect $middle_center $left_bottom 1 by_row true &
            wait
            paint_rect $middle_center $right_top 1 by_col true &
            paint_rect $middle_center $left_top 1 by_row true &
            paint_rect $middle_center $right_bottom 1 by_row true &
            paint_rect $middle_center $left_bottom 1 by_col true & ;;
        'corner to center')
            paint_rect $right_top $middle_center 1 by_row true &
            paint_rect $right_top $middle_center 1 by_col true &
            paint_rect $left_top $middle_center 1 by_col true &
            paint_rect $left_top $middle_center 1 by_row true &
            paint_rect $right_bottom $middle_center 1 by_col true &
            paint_rect $left_bottom $middle_center 1 by_row true &
            paint_rect $right_bottom $middle_center 1 by_row true &
            paint_rect $left_bottom  $middle_center 1 by_col true & ;;
        'louver')
            paint_rect $left_top $right_bottom 2 by_row &
            paint_rect $left_top_1 $right_bottom  2 by_col &
            wait

            paint_rect $middle_center $right_top 1 by_row true &
            paint_rect $middle_center $right_bottom 1 by_col true &
            paint_rect $middle_center $left_bottom 1 by_row true &
            paint_rect $middle_center $left_top 1 by_col true &
            wait

            paint_rect $middle_center $right_top 1 by_col true &
            paint_rect $middle_center $right_bottom 1 by_row true &
            paint_rect $middle_center $left_bottom 1 by_col true &
            paint_rect $middle_center $left_top 1 by_row true &
            ;;
        *) log_error "unknow error...";;
    esac
    wait
    tput cnorm # 恢复光标
}
代码虽然稍微有点长, 还是比较简单, 大致是: 确定方式->确定起始位置->擦除
【测试】
在 test.sh 中, 输入以下代码:
    # 根据实际文件位置修改路径
    # source ./data.sh
    # source ./console.sh
    effect(){
        local -A styles=(
            ['left to right']="41;33"
            ['right to left']="42;34"
            ['center to sides']="43;35"
            ['top to bottom']="44;36"
            ['bottom to top']="45;37"
            ['middle to sides']="46;31"
            ["center to corner"]="42;35"
            ['corner to center']="43;31"
            ['louver']="45;36"
            ['random']="42;35"
            )

        local lines=$(tput lines) cols=$(tput cols)
        local y=$[lines/2] key clr_str
        for key in "${!styles[@]}"; do
            clr_str=${styles["$key"]}
            draw_text_center "$key" $cols $clr_str $y 1
            sleep 1.5
            draw_rect  '' '' '' '' $clr_str
            erase_screen "$key"
        done
    }
    effect
    unset -f effect
运行结果见开篇视频.
以上测试代码比较长, 主要是为了展示所有的清屏 style. 正常使用, 一般如下即可(以百叶窗为例):
    # 根据实际文件位置修改路径
    # source ./data.sh
    # source ./console.sh
    # 必要时, 先全屏纯色
    draw_rect
    erase_screen louver # 或者采用随机, 不带参数: erase_screen
谢谢观看.